
Gatepass Management
Gatepass Management — Instructions for School Admin & Front Office
This guide explains how to create, issue, and track a Gatepass in InstaClass when a parent/guardian comes to school to pick up a student before regular logout time. Gatepasses help schools maintain security, record early exits, and (when enabled) collect parent acknowledgement as consent.
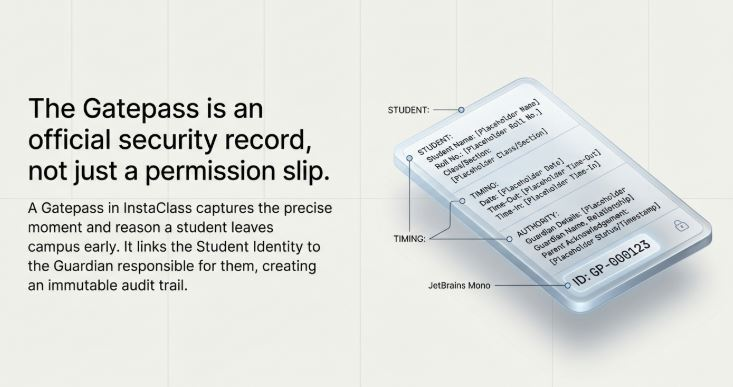
1) What is a Gatepass in InstaClass?
A Gatepass is an official record created by the school to allow a student to leave the campus early.
It captures:
- Student identity (name/roll/admission no.)
- Class/Section + Academic Year
- Date and time-out / time-in
- Guardian details (name, phone)
- Reason for early pickup
- Gatepass number (example: GP-000123)
- Gatepass status (Draft / Issued / Cancelled)
- Parent acknowledgement status (optional)
2) Who can create a Gatepass?
Typically:
- School Admin / Front Office / Reception
- Security Desk (if permitted)
- Class Teacher (optional, depending on school policy)
If you don’t see the Gatepass module, contact the Admin to enable access.
3) Before you start (requirements checklist)
Make sure the following are available in InstaClass:
✅ Academic Year (example: 2025-26)
✅ Students mapped to Grade & Section
✅ Parent/guardian phone number available (recommended for acknowledgement)
✅ Gatepass numbering enabled (auto-generated or school-defined format)
4) Gatepass basics (how InstaClass stores it)
InstaClass creates gatepasses under:
- Tenant (School) + Academic Year
- Student’s Grade & Section
- Linked Student record
Unique Gatepass Number
Each gatepass has a unique passNo like GP-000123.
⚠️ Important rule:
For the same School + Academic Year, the pass number must be unique.
(So the system must not generate duplicate pass numbers.)
5) Step-by-step: Create a Gatepass (Early Pickup)
Step 1 — Open Gatepass Module
- Login to InstaClass
- Go to Gatepass
- Click Create Gatepass (or New)
Step 2 — Select Student (recommended method)
Search and select the student by:
- Name / Admission No / Roll No
Once selected, InstaClass auto-fills:
- Grade, Section
- Student details (cached for fast history)
Step 3 — Fill Gatepass details
Enter the following fields:
A) Date
- Select today’s date (or required date)
B) Guardian / Visitor Details
- Guardian Name (example: “Ravi Kumar”)
- Guardian Phone (example: “98XXXXXXXX”)
C) Reason
Examples:
- Medical appointment
- Family emergency
- Personal reason
- Permission requested by parent
D) Department (optional)
Use if your school routes approvals via departments:
- Front Office / Principal / Coordinator / Transport etc.
Step 4 — Mark Exit Time (Time Out)
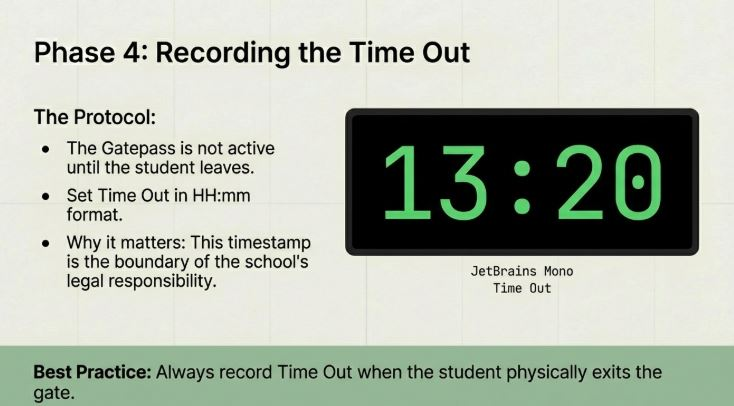
When the student leaves campus, set:
- Time Out (HH:mm format, example: 13:20)
✅ This ensures proper audit and security tracking.
Step 5 — Enable Parent Acknowledgement (Consent)
If your school policy requires parent consent tracking:
Turn ON:
✅ Acknowledgement Required
This will set the gatepass acknowledgement status as:
- Pending (default)
The parent will later confirm (acknowledge/decline) based on how your school delivers it (app notification/SMS/WhatsApp).
Acknowledgement Status options
- Pending → waiting for parent response
- Acknowledged → parent consent received
- Declined → parent rejected / disputed
Recommended policy: If acknowledgement is required, the gatepass should not be considered fully complete until acknowledged (or handled by school policy).
Step 6 — Issue Gatepass (Publish/Confirm)
Set Status:
- Issued (default & recommended)
- Draft (use if you want to prepare first and issue later)
- Cancelled (use if the request is withdrawn)
✅ Best practice workflow:
- Create as Draft while verifying details
- Switch to Issued once confirmed
6) Optional: Mark Return Time (Time In)
If the student returns back to school the same day (rare but possible), you can record:
- Time In (HH:mm format, example: 15:10)
This completes the movement history.
7) Viewing & Managing Gatepass History
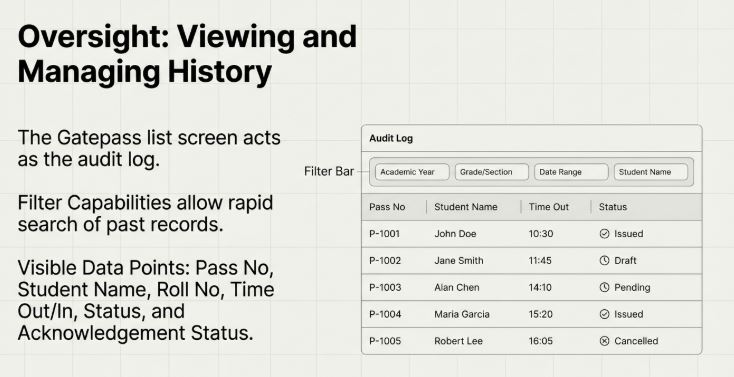
From the Gatepass list/history screen, you can filter by:
- Academic Year
- Grade & Section
- Date range
- Student search
Each record shows:
- Pass No
- Student Name + Roll/Admission No
- Date
- Time Out / Time In
- Status (Issued/Cancelled)
- Acknowledgement (Pending/Acknowledged/Declined)
8) Common scenarios & what to do
Scenario A: Parent arrives, pickup confirmed, student leaves
✅ Create Gatepass → Fill details → Set Time Out → Status Issued
(Optional) Enable acknowledgement and notify parent.
Scenario B: Parent comes but student does not leave
✅ Create as Draft → If cancelled, set Status = Cancelled.
Scenario C: Acknowledgement required but parent didn’t respond
- Gatepass remains Pending
- Follow school policy:
- Call parent / verify identity
- Admin may proceed and later record acknowledgement manually (if allowed)
Scenario D: Parent declines acknowledgement
- Acknowledgement Status becomes Declined
- Recommended action:
- Do not allow exit until verified with guardian and school authority
- Cancel gatepass if invalid request
9) Best practices (for school security)
- Always verify guardian identity (ID card / phone verification)
- Always record Time Out when student physically exits
- Use Acknowledgement Required for consent-based compliance
- Cancel incorrect gatepasses immediately (avoid duplicate/incorrect records)
- Keep reason clear and short (helps audit/reporting)
10) Quick checklist before issuing
✅ Correct student selected
✅ Correct guardian name & phone entered
✅ Reason entered
✅ Date selected
✅ Time Out recorded
✅ Acknowledgement Required set (if your policy needs consent)
✅ Status set to Issued