Manage Timetable
Timetable Management — Instructions for Admins & Teachers
This guide explains how to create, edit, and publish a class timetable in InstaClass. Follow these steps exactly to avoid errors and ensure the timetable shows correctly for teachers, students, and parents.
1) Who can create a timetable?
Typically:
- School Admin / Timetable In-Charge: full access (create, edit, publish)
- Teachers: access may be limited based on school settings (some schools allow teachers to edit their own classes)
If you don’t see the Timetable module, contact your Admin to enable access.
2) Before you start (requirements checklist)
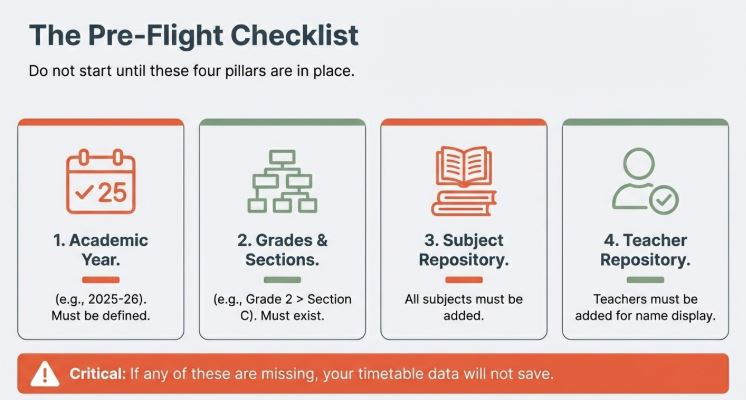
Make sure the following are already set up in InstaClass:
✅ Academic Year (example: 2025-26)
✅ Grades / Classes & Sections (example: Grade 2 → Section C)
✅ Subjects added (English, Maths, Science, etc.)
✅ Teachers added (recommended, so names can appear in the timetable)
If any of the above is missing, the timetable may not save properly or may show incomplete details.
3) Timetable basics (how InstaClass stores it)
InstaClass creates one timetable per:
- Academic Year
- Grade/Class
- Section
⚠️ Important rule:
For the same Academic Year + Class + Section, there can be only one active (published) timetable.
So you will either:
- Update the existing active timetable, or
- Create a new timetable and publish it (older one becomes inactive, if your school uses versioning)
4) Step-by-step: Create a timetable
Step 1 — Open Timetable Module
- Login to InstaClass
- Go to Timetable
- Click Create Timetable (or Add / New)
Step 2 — Select Academic Year, Grade, and Section
Choose:
- Academic Year (example: 2025-26)
- Grade/Class (example: 2)
- Section (example: C)
✅ Double-check these selections
Because the timetable is saved based on this combination.
Step 3 — Set the Period Timing (Auto Time Slot Generation)

In InstaClass, you don’t have to manually type every period’s start/end time.
Instead, you set:
- Start Time (example: 09:00)
- Duration per Period (example: 45 minutes)
- Number of Periods (example: 7 or 8)
Based on these inputs, InstaClass will automatically generate all period time slots in order.
Example
If you enter:
- Start Time: 09:00
- Duration: 45 minutes
- No. of Periods: 4
InstaClass auto-creates:
- Period 1 → 09:00 – 09:45
- Period 2 → 09:45 – 10:30
- Period 3 → 10:30 – 11:15
- Period 4 → 11:15 – 12:00
Internally, InstaClass saves these as startTime and endTime for each slot.
Adding Break / Lunch
If your school has break(s), you can insert a Break slot between periods (based on what your timetable screen supports), usually by selecting:
- Slot Type: Break / Lunch (or)
Subject Name: BREAK / LUNCH
Then enter the break duration (example: 15 minutes).
InstaClass will automatically push the next periods forward so timings remain correct.
Example
- Period Duration: 45 mins
- Break Duration: 15 mins after Period 2
- Start: 09:00
Auto result:
- P1 09:00–09:45
- P2 09:45–10:30
- Break 10:30–10:45
- P3 10:45–11:30
- P4 11:30–12:15
Timing rules (important)
- Use 24-hour format (HH:mm), e.g., 09:00, 14:10
- Duration is usually in minutes
- Avoid overlapping by letting the system auto-generate slots
- If Saturday has fewer periods, set a separate Saturday period count (if available) or create Saturday entries separately
Step 4 — Fill Subjects Day-wise (with Copy Option)
After InstaClass generates the period time slots (based on Start Time + Duration + Number of Periods), you will assign subjects (and optionally teachers) for each period day-by-day.
What you need to fill for each period
For every period row, you will typically select:
- Subject
- Teacher (optional but recommended)
✅ Note: You usually do not need to manually type Start/End time here because the system has already generated time slots.
Example (Monday)
- Period 1 → English → Teacher: Ramesh
- Period 2 → Maths → Teacher: Anita
- Break → BREAK (no teacher)
- Period 3 → Science → Teacher: (optional)
⭐ Time Saver: Copy Subjects From One Day to Another
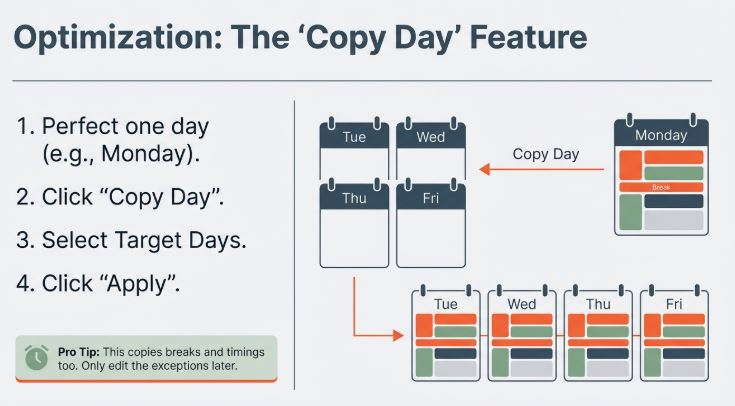
If your timetable pattern is similar across multiple days, InstaClass provides a Copy option.
How Copy works
You can copy all subjects/period mapping from one day to one or more other days.
✅ You can copy:
- Monday → Tuesday / Wednesday / Thursday / Friday / Saturday
- Wednesday → Friday
- Any day → Any other day(s)
This is helpful when:
- Monday to Friday periods are the same
- A specific day pattern repeats (e.g., Wednesday pattern reused on Friday)
How to use the Copy option (recommended workflow)
- Complete one day first (usually Monday)
- Click Copy Day
- Select:
- From Day (example: Monday)
- To Day(s) (example: Tuesday, Wednesday, Thursday, Friday)
- Click Apply Copy
- Review each copied day and make small adjustments if needed
✅ Tip: After copying Monday to all weekdays, you only need to change the few periods that are different.
Break / Lunch periods
If your school includes breaks:
- Keep break slots as BREAK / LUNCH
- Teacher is not required
- Break periods can also be copied along with the day pattern (so you don’t have to add them again)
Step 5 — Enable/Disable Teacher Names
There is an option called:
✅ Show Teacher Names
- ON → Teacher names will appear in timetable views
- OFF → Only subject names will appear
Recommended:
- Keep ON for internal school use
- Turn OFF if your school policy doesn’t allow teacher display
Step 6 — Save Draft vs Publish
Most schools follow this approach:
Save Draft
- Use while preparing timetable
- Not visible to all users until published (depends on your school settings)
Publish
- Makes the timetable active and visible in Timetable views
- Students/Parents/Teachers will start seeing it as the official timetable
⚠️ Publishing rule
If a timetable already exists for the same class/section/year, InstaClass may:
- Update it, or
- Ask you to replace it (depending on your configuration)
5) Editing an existing timetable
To edit:
- Open Timetable
- Select Academic Year + Grade + Section
- Click Edit
- Update subjects or teachers
- Save or Publish again
✅ You can change teacher mappings anytime without changing the schedule.
6) Common mistakes & how to avoid them
Mistake 1: Overlapping periods
Example (wrong):
- Mon 09:00–09:45
- Mon 09:30–10:15
✅ Fix: Ensure each time slot ends before the next begins.
Mistake 2: Wrong Academic Year selected
If you create under the wrong year, you’ll think timetable is “missing”.
✅ Fix: Always confirm Academic Year at the top before saving.
Mistake 3: Duplicating another active timetable
If you try to create a new published timetable when one is already active, saving may fail.
✅ Fix: Edit the existing timetable instead of creating a new one.
Mistake 4: Teacher name not showing
This happens when:
- Teacher isn’t assigned in that slot, OR
- “Show Teacher Names” is off
✅ Fix: Assign teacher or enable “Show Teacher Names”.
7) Best practices for a perfect timetable
- Prepare timing structure first (period durations, breaks)
- Fill subject timetable fully (Mon–Fri)
- Add Saturday separately if shorter
- Assign teachers after subjects are finalized
- Publish only after cross-checking all days
8) Quick checklist before publishing
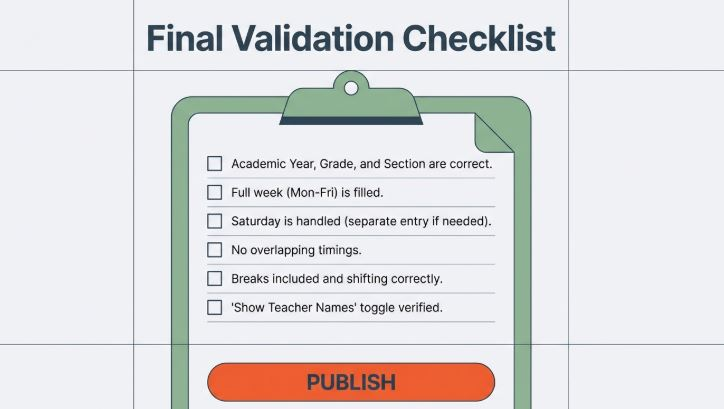
Before you click Publish, confirm:
✅ Academic Year is correct
✅ Grade & Section are correct
✅ All days are filled correctly
✅ No overlapping timings
✅ Breaks included properly (if needed)
✅ Teacher names enabled (if required)
✅ Notes added (optional, for staff clarity)